Etching Metal
Hand Drawn Bubbles With a Black Sharpie
It is always nice to cross something off that has been on your bucket list for awhile. I think I had these etching materials for 6 months before I pulled them out.
You can see some of my ingredients above.
*Ferric Chloride - from Radio Shack: Etchant, will work on copper brass and nickel silver NOT on aluminum, fine silver or sterling. (fyi nickel silver takes longer to etch)
*Baking Soda - as a neutralizing agent
*Metal cleaner - Sculpt Nouveau : Metal Cleaner Degreaser, Barkeepers Friends or Penny Brite. Barkeepers Friend is great and you can find it at your local Target.
*Baking Soda - Neutralizer
*Green Scrubbies - Metal Cleaning you can get at Target
*Plasic or Glass containers - 1 for the Ferric Chloride & 1 for the Baking Soda and Water.
* StazOn Stamp Ink pad, Sharpie Black Marker or Toner Transfer - There are other resists you can use also.
*Gloves
*Packing Tape, Duct Tape or Painters Tape - There are others tapes you can use to.
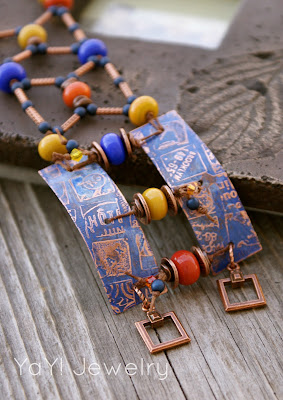
Etched with a StazOn Ink and a Stamp. Vintaj Patinas.
1. First thing clean your copper using Barkeepers Friend or what I have here is Metal Cleaner Degreaser from Sculpt Nouveau. Use your green scrubby pads. They are fabulous. Skin oils can act as a resist. You don't want your finger prints to etch the metal.
2. Draw your design using a black sharpie or a stamp using StazOn black stamping ink. Try to prevent to much handling of the metal, make sure your hands are washed and degreased at least. Above I used this stamp with StazOn Ink for my resist.
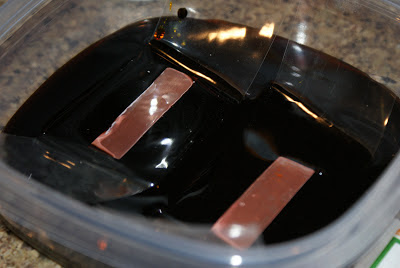
3. Pour the Ferric Chloride in a plastic tub or glass as you can see 3/4 - 1 inch. You will tape the back sides of the metal with the facing side you want etched down in the solution. I have also seen people use foam as a float and your metal taped to that. I actually think this would be a less sloppy way to do it. Tape or use your sharpie for any areas you do not want the etching process. You can see the tape on either side of the plastic. I etched this for 1 hour & 15 minutes. I think you can etch it in less time but I wanted a good etch for this. You can accelerate the etching time by adding Citric Acid from the grocery, but this is not necessary.
This one was done Etched using StazOn Ink as a resist.
4. You can check your etching just pull up the tape back. If you make the floats as stated above that would make the checking really easy. I wear gloves when I do this. When done, do use and scrub in the Baking Soda Solution to neutralize and stop the Etching.
When you are done clean your metal with your metal cleaner. You can now use your designs as is or patina them as you wish. Here are a few of the ones I have etched and added patinas below.
Abstract Koi Fish - Hand Drawn with Black Sharpie
Made this on for the Bead Soup Block Party 7
Now just make some fabulous jewelry and cross etching off your bucket list.
It is easy and addicting.


Great Post Kristin, I've been wanting to try etching like this, thanks for taking the fear factor out of this for me. Adding this to my must do list...
ReplyDeleteIt really is easy and not that expensive to get into.
DeleteI just tried etching for the first time this weekend. My etches didn't turn out as deep as yours, but I was more impatient than you were!! What gauge did you use?
ReplyDeleteI kept mine in about 1 hour 15 minutes. I would keep it in longer. I took the packaging off of my metal but my guess is that it was24 gauge. Hope this helps. Also if the solution is older it may take longer to etch. I lifted mine up and with gloves ran my finger along it to see if that was how deep I wanted the etch.
DeleteI think making those floats would make the etching process much easier. I think I saw that on the Rings N Things website.
DeleteI will try with foam float next time, tape is a PIA! I work in IT and we got a huge shipment of computers which always have foam in them. The etchant was new! We only kept it in about 45 mins, so definitely need to wait longer.
DeleteThanks to your inspiration Kristin, I tried some etching this past week and am really liking the results. I appreciate your tutorial it gave me the push I needed :-D
ReplyDeleteYaY!!!!!!!!! Cant wait to see what you made!!!!
Delete